Integrating CodeRabbit with GitHub Enterprise Server
This page is for GitHub Enterprise Server (Self-Hosted) users only.
If you're using github.com, log in to CodeRabbit
and add your repositories from there
This page guides you through the process of integrating your Self-Managed GitHub with CodeRabbit.
To initiate the integration, we require specific information. This is essential for the initial setup of CodeRabbit within your domain. Once this setup is complete, you can log in directly.
Step 1: Getting Started
Visit CodeRabbit: Visit our Login page and select Self-Hosted GitHub
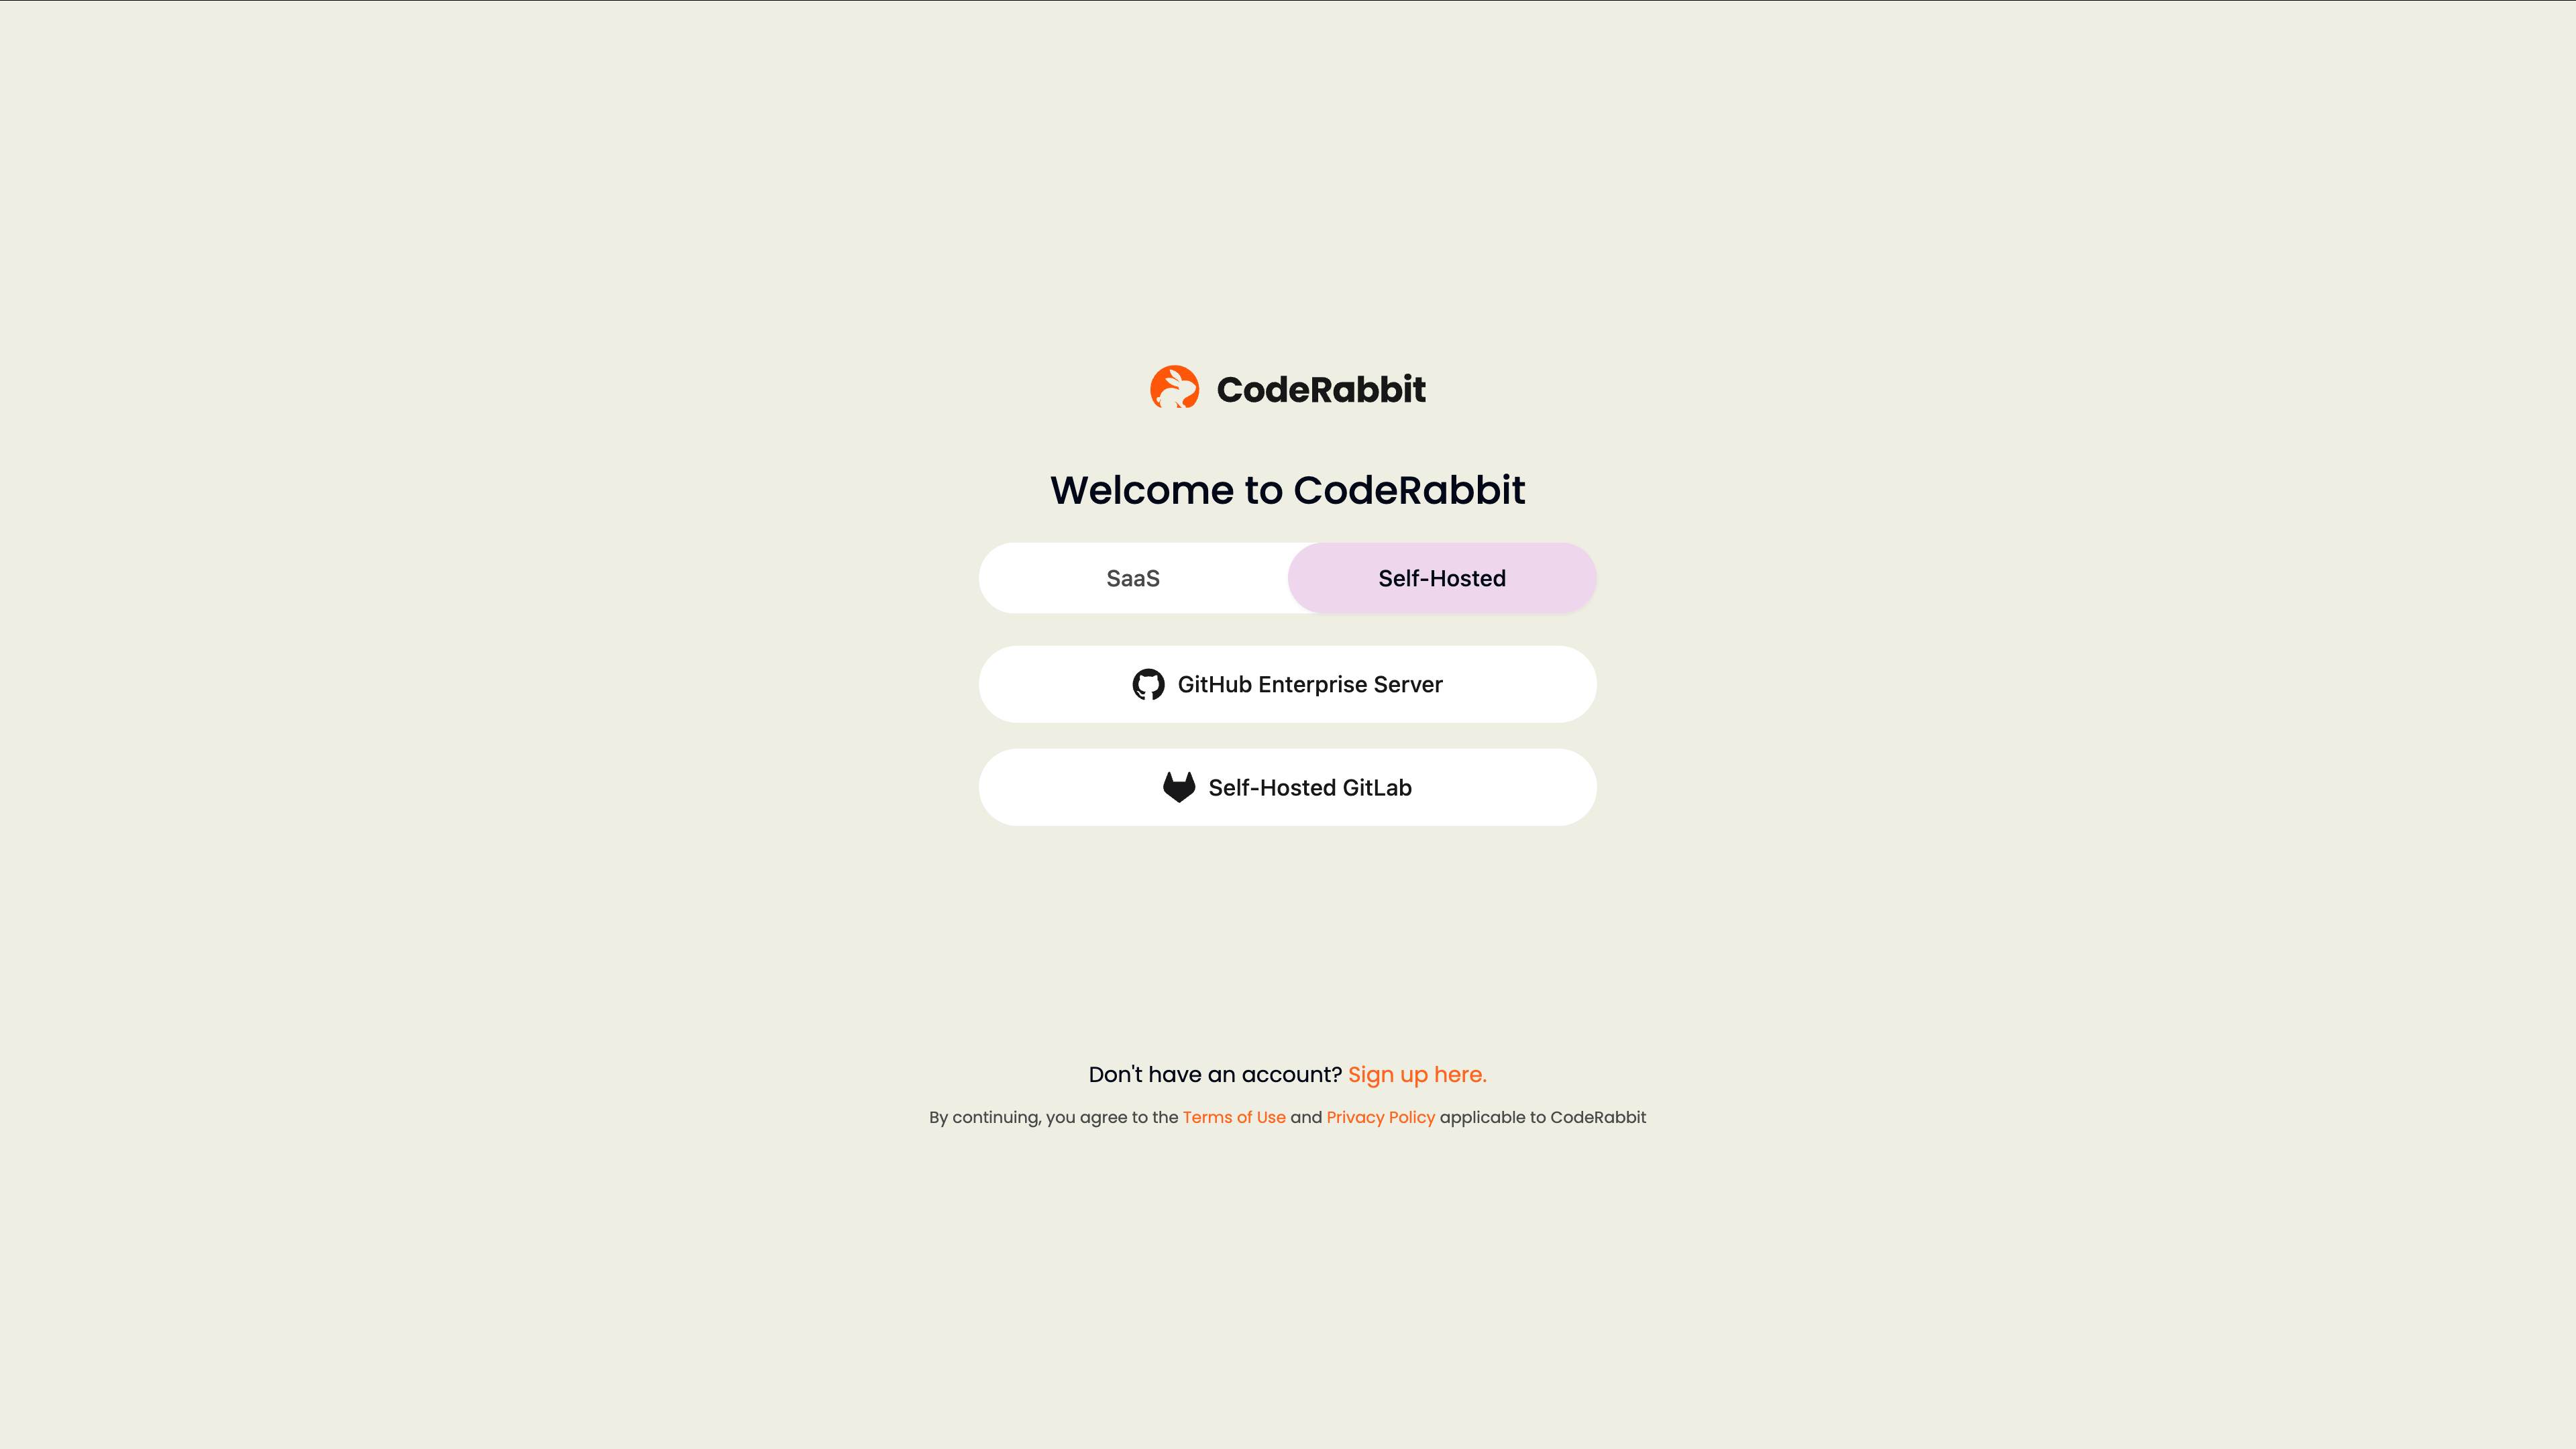
On this page, enter the URL of your self-managed GitHub instance and click submit. Once, you submit, we check our database for a record of your organization and if we find an existing one, we will start the login process.
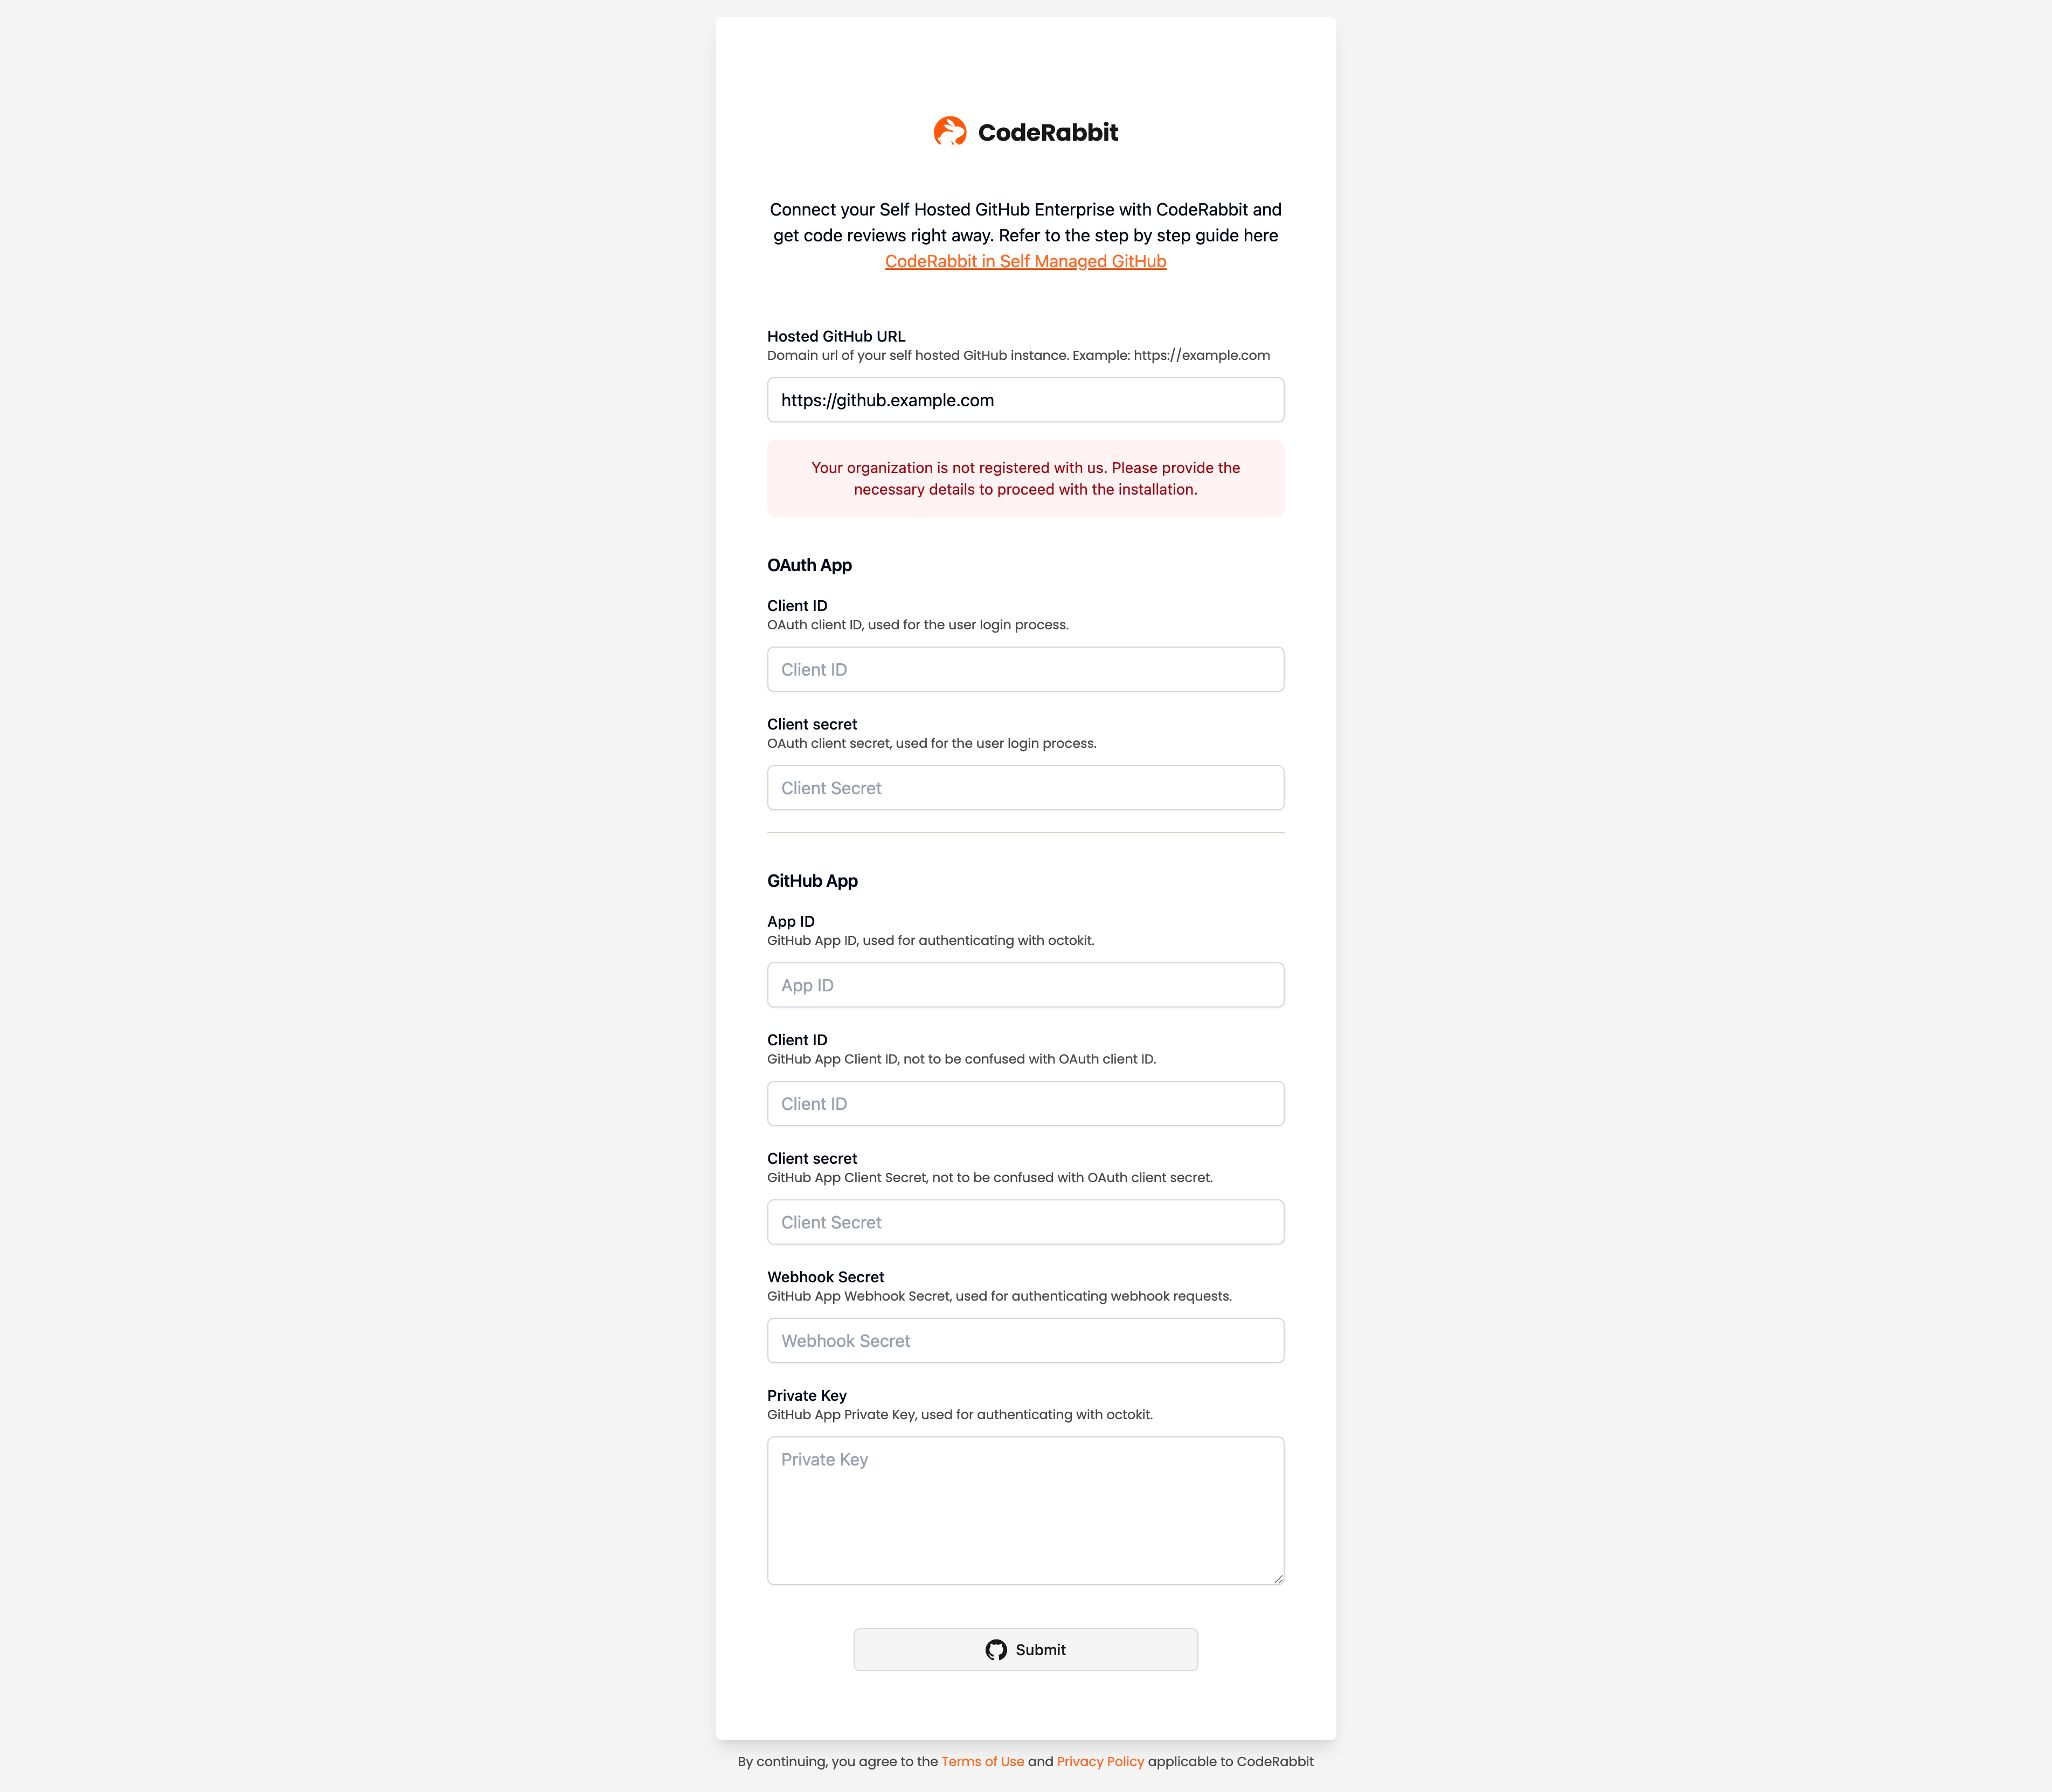
If the self-managed GitHub instance is not found, you will be required to enter more details for the onboarding.
Step 2: GitHub OAuth App
Navigate to your GitHub Enterprise Server (Self-Hosted) Instance and follow the steps below to create an OAuth App:
- Sign in to your GitHub Enterprise account.
- In the upper-right corner of any page, click your profile photo, then click Settings.
- In the left sidebar, click Developer settings > OAuth Apps.
- Click New OAuth App.
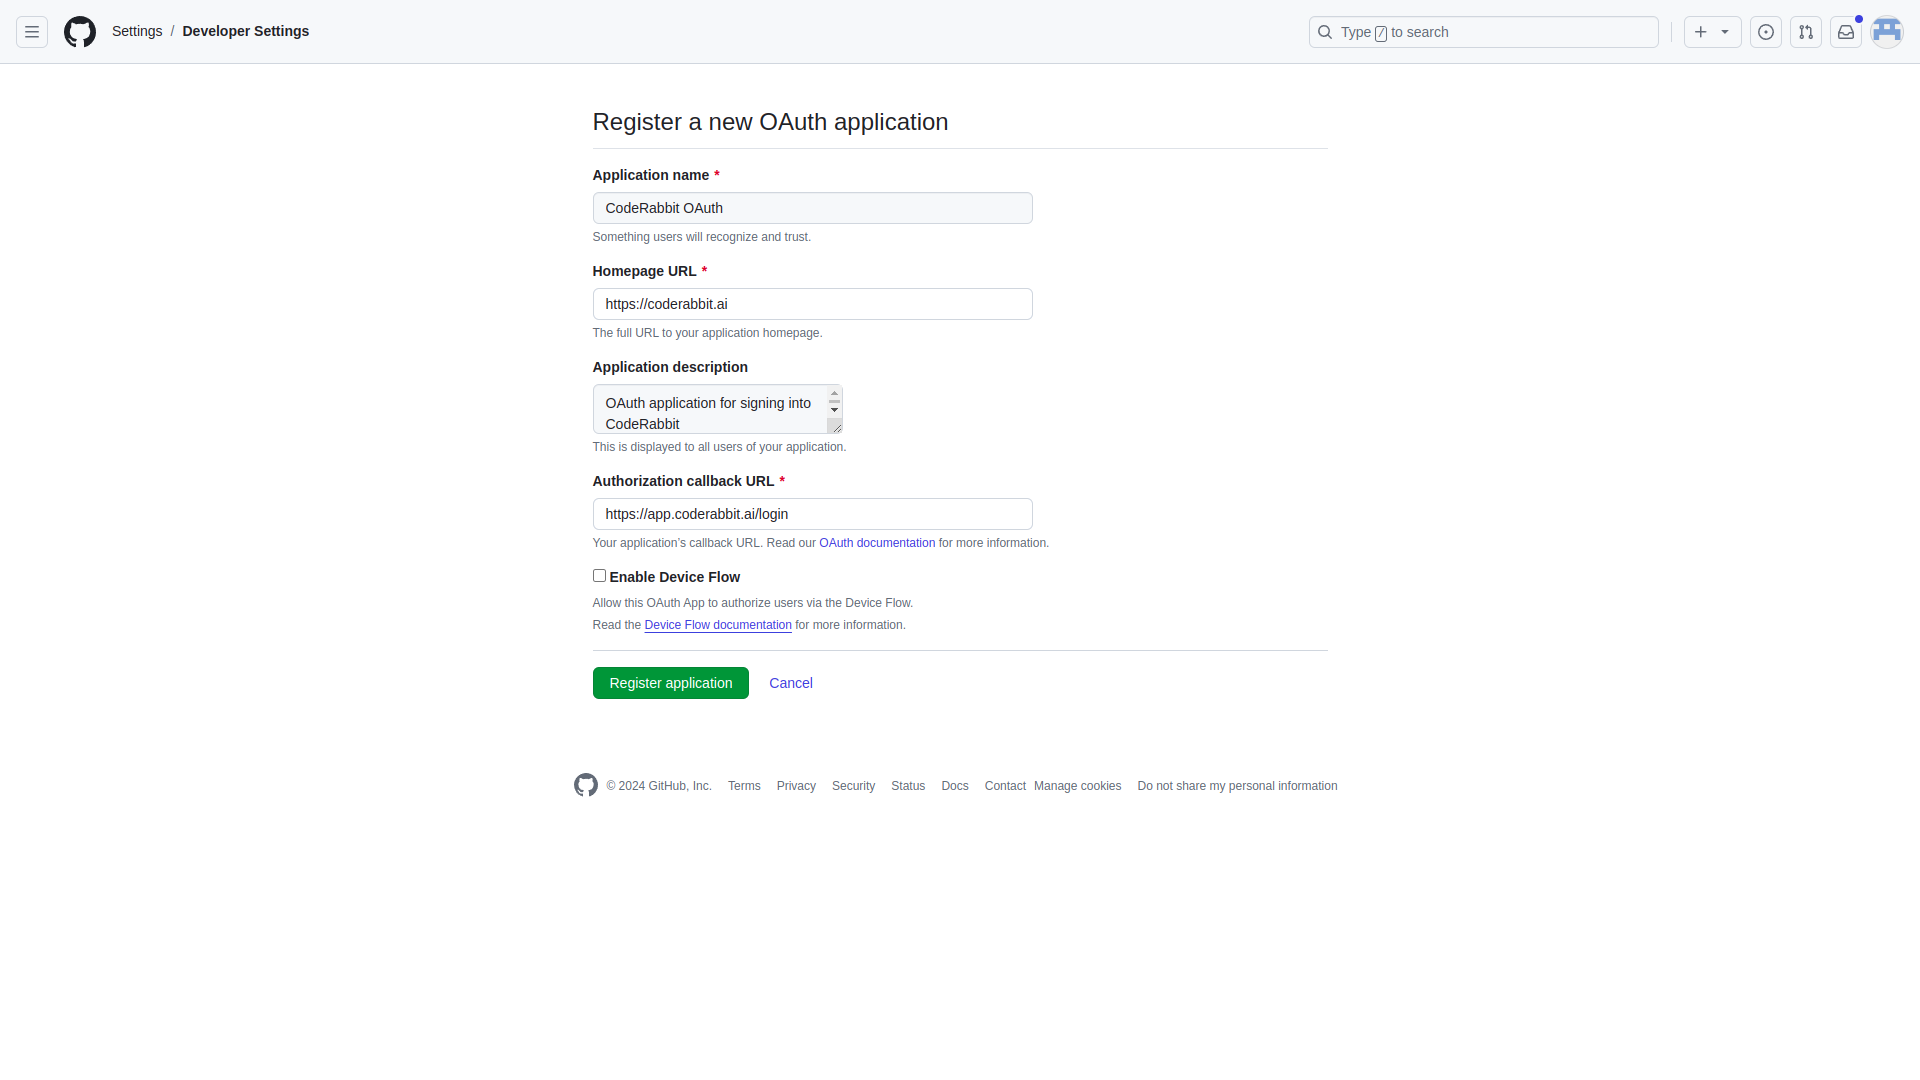
- Set the following fields:
- Application name:
CodeRabbit OAuth - Homepage URL:
https://coderabbit.ai - Application description:
OAuth application for signing into CodeRabbit - Authorization callback URL:
https://app.coderabbit.ai/login
- Application name:
- Click Register application.
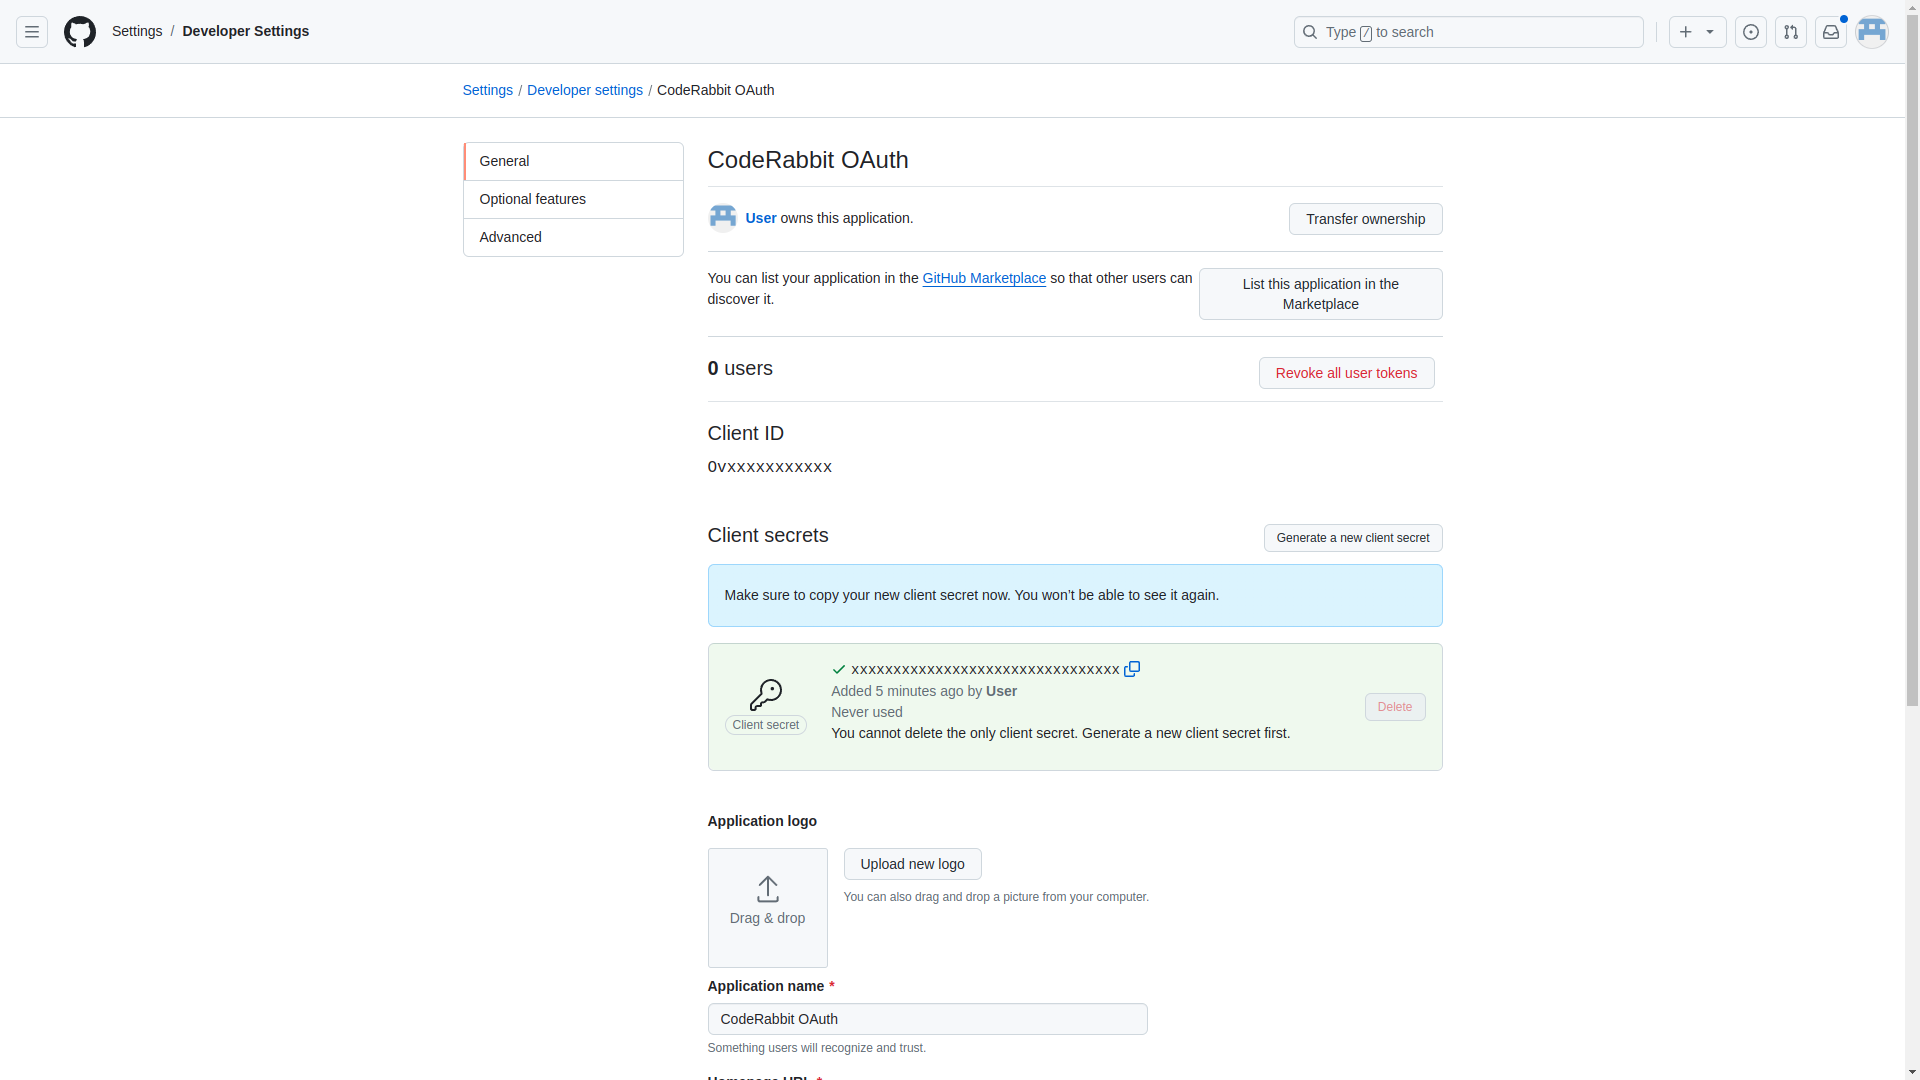
Once the OAuth App has been created, click on Generate a new client secret under the 'Client secrets' section and copy the secret as it will be visible once only
Keep the following details handy:
- Client ID
- Client secret
Step 3: GitHub App
Navigate to your GitHub Enterprise Server (Self-Hosted) Instance and follow the steps below to create a GitHub App:
- Sign in to your GitHub Enterprise account.
- In the upper-right corner of any page, click your profile photo, then click Settings.
- In the left sidebar, click Developer settings > GitHub Apps
- Click New GitHub App.
- Set the following fields:
- GitHub App name:
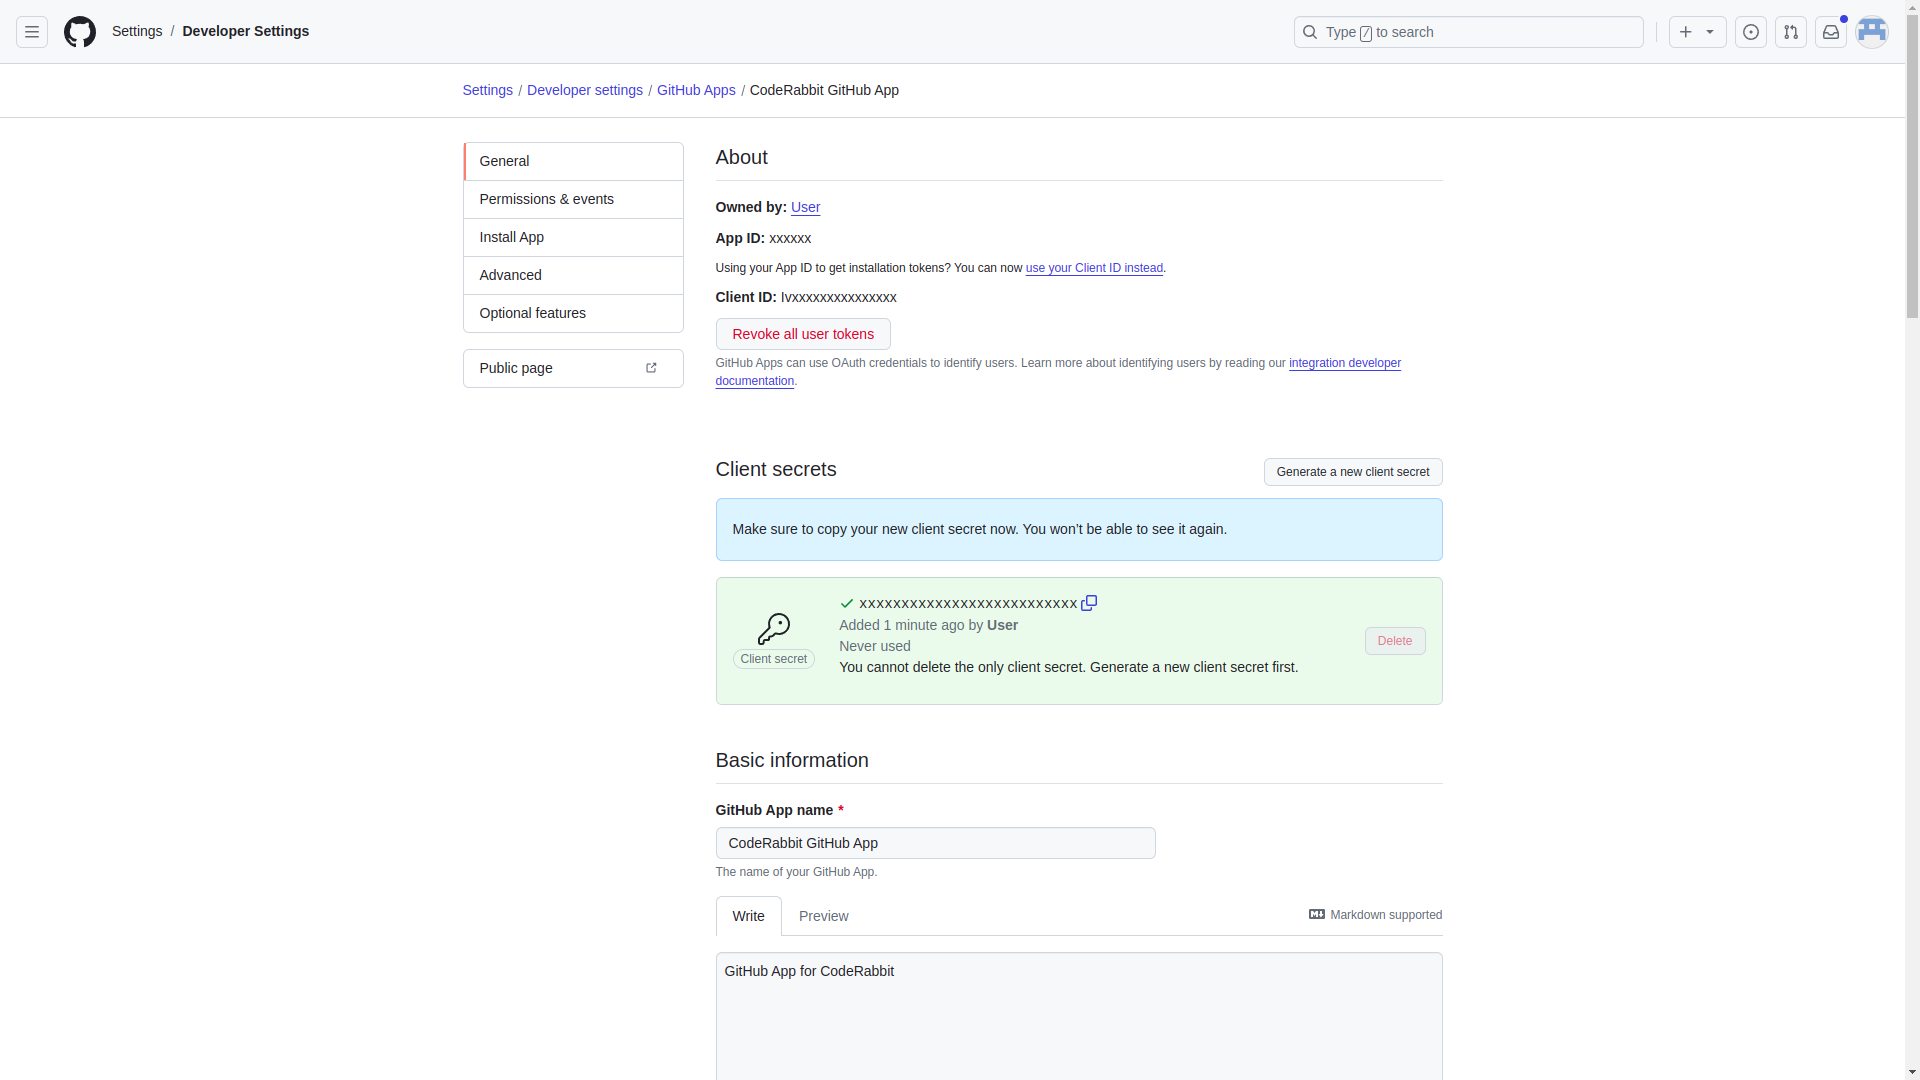
CodeRabbit - Description:
GitHub App for CodeRabbit - Homepage URL:
https://coderabbit.ai - Callback URL:
https://app.coderabbit.ai/login - Request user authorization (OAuth) during installation:
true - Webhook Active:
true - Webhook URL:
https://app.coderabbit.ai/githubHandler - Webhook secret: Use a secure string and keep it handy.
- Permissions:
- Repository permissions:
- Actions: Read-only
- Checks: Read-only
- Contents: Read and write
- Commit statuses: Read and write
- Discussions: Read-only
- Issues: Read and write
- Metadata: Read-only
- Pull requests: Read and write
- Organization permissions:
- Members: Read-only
- Events:
- Meta
- Issue comment
- Issues
- Label
- Public
- Pull request
- Pull request review
- Pull request review comment
- Pull request review thread
- Push
- Release
- Repository permissions:
- Where can this GitHub App be installed?: Select
Any account
- GitHub App name:
- Click Create GitHub App.
Once the GitHub App has been created, click on Generate a new client secret under the 'Client secrets' section and copy the secret as it will be visible once only.
Scroll down and click on Generate a private key under the 'Private keys' section and download the PEM file.
Keep the following details handy:
- App ID
- Client ID
- Client secret
- Webhook secret
- Private key
We recommend using the CodeRabbit logo as the profile picture to ensures easy recognition.
Step 4: CodeRabbit UI Onboarding
Submit the details that were accumulated in previous steps:
- Host URL of your GitHub instance
- OAuth Client ID
- OAuth Client Secret
- GitHub App ID
- GitHub App Client ID
- GitHub App Client Secret
- GitHub App Webhook Secret
- GitHub App Private Key
Click on Submit and the login process will be initiated. On subsequent visits, your setup will be automatically detected, allowing for direct login.
Step 5: Install the GitHub App
Navigate to the GitHub App that was created from your GitHub Enterprise Server (self-hosted) instance and click on the Install App tab. Then, install the GitHub App to your organization(s).
If you performed this step before Step 4, the installation event likely will
have failed, and you will need to re-send the installation event.
Navigate to the Advanced tab in the GitHub App and click on the
Redeliver button for the failed installation.created event.
Step 6: Whitelist CodeRabbit IP address
Use this CodeRabbit IP if your instance requires IP whitelisting
35.222.179.152/32 and 34.170.211.100/32.
VPN tunneling is available as an add-on package. Please reach out to us at support@coderabbit.ai if you are interested.
FAQ
Who should create the OAuth App and GitHub App?
The OAuth App and GitHub App should be created by a user with administrative privileges on the GitHub Enterprise Server instance. This user will be responsible for managing the integration with CodeRabbit.
I see an error when trying to log in to CodeRabbit. What should I do?
If you encounter an error during the login process, please ensure that:
- The OAuth App and GitHub App are correctly configured with the right URLs and permissions.
- The browser local storage and cookies related to CodeRabbit are cleared.
If the issue persists, contact our support team.